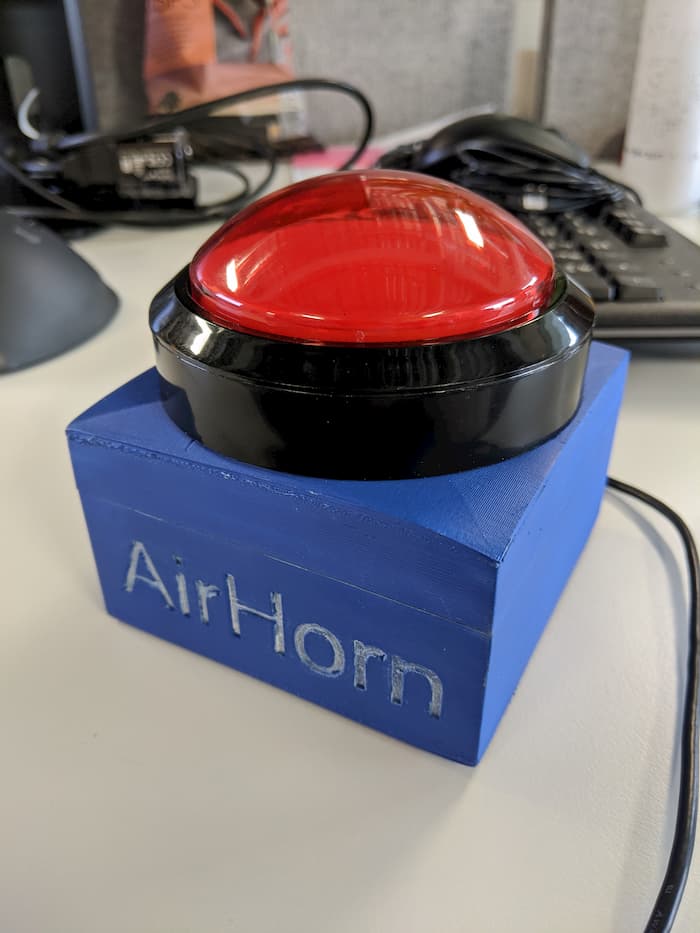
During the holiday season, I decided to experiment with building a physical button for Paul Kinlan’s AirHorn. This blogpost provides the instructions and links so you can also build your own WebUSB powered AirHorn Button.
What you Will Need
- An Arduino Device. I used an Arduino Nano 33 IoT.
- A Momentary button or Switch. I used this massive red button from Pimoroni.
- A 10k Ohm Resistor
Getting Started
WebUSB is an API that securely provides access to USB devices from Web Pages. The API has been around for a while, and hass been available in Chrome since version 61.
I didn’t know anything about the API and the first step was to figure out how hard this would be. Fortunately, Francois Beaufort wrote a handy getting started guide.
Hooking up a Button on the Arduino
The button was hooked up to the Arduino Board exactly as shown in the Arduino Button Tutorial. The implementation uses the Arduino WebUSB library. Make sure to follow the steps to setup the library on your development computer.
The Arduino implementation is a slightly modified verson of the Arduino Button Tutorial to
implement something analog to keydown and keyup events.
When the pin voltage is HIGH, it means the button is pressed. When it is LOW, it means the
button is not pressed. To create the desired behaviour we want to check when the button state
changes from LOW to HIGH, meaning the button was pressed, and from HIGH to LOW, meaning
the button was released.
We send an ON message via the serial bus when the button is pressed and an OFF message when
it is released.
Here's what the code looks like:
#include <WebUSB.h>

/**
 * Follow the instructions on https://github.com/webusb/arduino/ to install
 * the library and get the Arduino IDE to build and install it correctly.
 */
WebUSB WebUSBSerial(1 /* https:// */, "webusb-horn.firebaseapp.com");

#define Serial WebUSBSerial

const int ledPin = 13;
const int buttonPin = 2;
int previousButtonState = 0;

void setup() {
  while (!Serial) {
    ;
  }
  Serial.begin(9600);
  Serial.write("Sketch begins.\r\n> ");
  Serial.flush();
  pinMode(ledPin, OUTPUT);
  pinMode(buttonPin, INPUT);
}

void loop() {
  if (Serial) {
    int buttonState = digitalRead(buttonPin);
    if (buttonState != previousButtonState) {
      if (buttonState == HIGH) {
        digitalWrite(ledPin, HIGH);
        Serial.write("ON\r\n");
      } else {
        digitalWrite(ledPin, LOW);
        Serial.write("OFF\r\n");
      }
      Serial.flush();
    }
    previousButtonState = buttonState;
    delay(10);
  }
}
On the JavaScript side, we need to connect to the Arduino and then listen to messages on the serial
interface. When an ON message is received, we start the AirHorn with airhorn.start(). When an
OFF message is received, we stop it with airhorn.stop();
This is implemented in the _loopRead method in the code listing below. Check this commit to
see all changes made to AirHorn to make this work.
const HardwareButton = function(airhorn) {
  this.airhorn = airhorn;
  this.decoder = new TextDecoder();
  this.connected = false;
  const self = this;
  this._loopRead = async function() {
    if (!this.device) {
      console.log('no device');
      return;
    }

    try {
      const result = await this.device.transferIn(2, 64);
      const command = this.decoder.decode(result.data);
      if (command.trim() === 'ON') {
        airhorn.start({loop: true});
      } else {
        airhorn.stop();
      }
      self._loopRead();
    } catch (e) {
      console.log('Error reading data', e);
    }
  };

  this.connect = async function() {
    try {
      const device = await navigator.usb.requestDevice({
        filters: [{'vendorId': 0x2341, 'productId': 0x8057}]
      });
      this.device = device;
      await device.open();
      await device.selectConfiguration(1);
      await device.claimInterface(0);
      await device.selectAlternateInterface(0, 0);
      await device.controlTransferOut({
        'requestType': 'class',
        'recipient': 'interface',
        'request': 0x22,
        'value': 0x01,
        'index': 0x00,
      });
      self._loopRead();
    } catch (e) {
      console.log('Failed to Connect: ', e);
    }
  };

  this.disconnect = async function() {
    if (!this.device) {
      return;
    }

    await this.device.controlTransferOut({
      'requestType': 'class',
      'recipient': 'interface',
      'request': 0x22,
      'value': 0x00,
      'index': 0x00,
    });
    await this.device.close();
    this.device = null;
  };

  this.init = function() {
    const buttonDiv = document.querySelector('#connect');
    const button = buttonDiv.querySelector('button');
    button.addEventListener('click', this.connect.bind(this));
    if (navigator.usb) {
      buttonDiv.classList.add('available');
    }
  };

  this.init();
};
This is how the result looks like:
[Optional] Building a case for our button
Finally, to make a nice packaging for the project, we can 3D print a box to fit our button and the required electronics inside. The design I used is available at Thingiverse, and it contains both the box and a lid where the button can be fitted.
Here's an interesting video of the box being printed:
Final Result
Finally, I used blue acrylic paint to give a nice color for the box. This is what the final result looks like:

Comments
No comments yet. Be the first to comment!
Leave a comment
Comments are moderated and may take some time to appear.